Spot measurement - High thickness
F70
1. Built-in online diagnostics
2. Standalone software included
3. Sophisticated history function for saving, reproducing, and plotting results
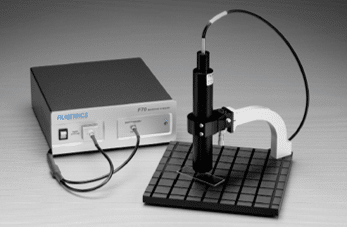
The F70s are general-purpose thickness measurement instruments that are capable of measuring thicknesses up to 15mm. Common applications include glass and plastic sheets, lenses, and containers and semiconductor wafers.
The basic F70 is designed to measure transparent materials while the F70-NIR measures semiconductor materials. The thickness range is determined by the lens and software options (see datasheet for details).
Thickness can be measured in less than a second. Like all Filmetrics thickness measurement instruments, the F70 connects to the USB port of your Windows™ computer and sets up in minutes.
Reflectometry
Applications
- Coatings on almost any surface, even pharmaceutical tablets, wood, and paper
- Glass and plastic sheet, tubing, containers
- Optical and ophthalmic lenses
More info on applications
- Dielectric
- Hard thickness
- IC failure analysis
- ITO and other TCO
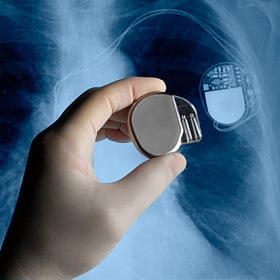
- Medical equipement
- Metal thickness
- Microfluidics
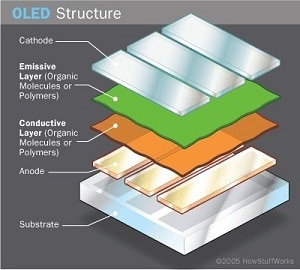
- OLED
- Ophthalmic coatings
- Parylene Coatings
- Photoresist
- Porous silicon
- Treatment films
- Refractive index & k
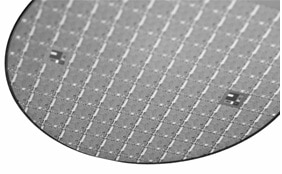
- Wafers and membranes of silicon
- Solar applications
- Semiconductor teaching laboratories
- Roughness and surface finish
Measure the Thickness of Transparent Materials Up to 15mm Thick
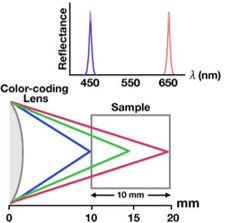
Color-coding Thickness Measurement (CTM) is a non- contact measurement method for transparent materials. Up to two layers can be measured simultaneously. Measurements are taken from only one side of the sample and are relatively immune to roughness, non-uniformity, and curvature.
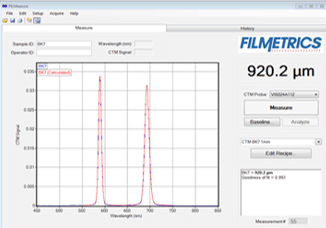
CTM measures the thickness of a sample by sensing the distance of the sample’s top and bottom surfaces simultaneously. This is achieved by using a lens that focuses different wavelengths (corresponding to different colors and therefore giving this measurement method its name) at different distances. Because the wavelength that is reflected back directly depends on the distance between the lens and the sample’s top and bottom surfaces, the thickness can be easily calculated based on the two peaks in the reflectance spectrum (see figure right).
With USB connectivity and sophisticated Windows-based software the system sets up in minutes and results are available in seconds or less.
ADVANTAGES
- Built-in online diagnostics
- Standalone software included
- Sophisticated history function for saving, reproducing, and plotting results
Specifications
The F70 can measure different thickness ranges by using different lens assemblies.
Adding full spectral reflectance capabilities is possible as an upgrade:
| Lens Assembly or Upgrade Kit | Thickness Range (index=1.5) | Accuracy 1 | Precision 2 | Working Distance | Spot Size |
| LACTM-VIS-0.1mm | 15 μm-0.15 mm | 0.4 µm | 0.05 µm | 3.3 mm | 10 µm |
| LACTM-VIS-0.3mm | 30 μm-0.45 mm | 0.7 µm | 0.10 µm | 4.5 mm | 10 µm |
| LACTM-VIS-1mm | 50 μm-1.5 mm | 1.5 µm | 0.20 µm | 4.7 mm | 10 µm |
| LACTM-VIS-2.4mm | 150 μm-3.5 mm | 2 µm | 0.20 µm | 13 mm | 20 µm |
| LACTM-VIS-9mm | 0.5 mm-15 mm | 7 µm | 2 µm | 21 mm | 50 µm |
| UPG-F70-SR-KIT | 0.015 μm -40 μm | 2 nm | 0.1 nm | 0-500 mm | 1.5 mm 3 |
1 Material dependent. Typical value for midrange thickness.
2 Typical value, 1σ of repeated midrange measurements under unchanged conditions.
3 200µm with optional FO-SPL-PEG-SMA-100-1.3
| Spectrometer | ||
| Wavelength Range: 380 – 1050 nm | ||
| Operating System | ||
| PC: | Windows XP(SP2) - Windows 8(64-bit) | |
| Mac: | OS X Lion/Mountain Lion running Parallels | |
| General | ||
| Sample Size: From 1 mm to 300 mm diameter and up | ||
| Light Source: Regulated Tungsten-Halogen (LED optional) | ||
| Interface: | USB 2.0 | |
| Power Requirements: | 100-240 VAC, 50-60 Hz, 20W | |
| Certifications: | CE EMC and safety directives | |
Contact us for more information about this product
Would you like an estimation ?
Additional information?
We will reply to you within 24 hours


